Bow Down, Witches: The Beyoncé Jack-o-Lantern of Your Dreams
by Isabella Rotman and Jacqui Shine


All of us need to check in with ourselves about our Yonce-worship practices occasionally. Have you sung Bey’s praises lately? Have you updated your personal altar with a fresh candle or worked on your Everything Beyonce Pinterest page? Have you seen this brilliant gourd-based tribute to Her Greatness and thought, “If only I had an MFA and an extra set of thumbs?”
We’re here to help. As great minds in Williamsburg put their skills to work, we in Chicago have been busy brewing up the perfect how-to.
What you will need:
A pumpkin (obviously): Ideally you’ll want a pumpkin that is a little flat on one side, but pumpkins, like all of us, are unique snowflakes. Your particular pumpkin might have extra-thick walls or weird surface lumps or we don’t even know what. Carving Beyoncé’s VMAs likeness onto a pumpkin is an imperfect science.
Pumpkin carving tools: You have two options here. The best thing to do is just buy a pumpkin-carving kit. We bought this Pumpkin Masters kit at the grocery store for about $5. If you don’t want to do that, you need something to poke holes with. A needle or a small nail are too small for this. Something like an awl (jk, the real kind) or a large nail or even a ballpoint pen would work. An assortment of kitchen implements can be put to creative use as well.
Two copies of this pattern: It’s useful to have one for reference. The image is 6” x 7” or so, but if you can print it larger (because you have an enormous pumpkin or whatever), you should, because the fiddly parts will be somewhat less fiddly.
A serrated knife (a steak knife will work)
A large spoon
An X-Acto knife or snap-blade utility knife
Tape
Newspapers or plastic sheeting to put down on your work surface
A bucket for pumpkin guts (optional)
A towel or two (this gets very goopy)
Straight pins or something similar (optional)
An appropriate soundtrack (cue up all your Bey, obviously, or perhaps listen to this conversation between Laverne Cox and bell hooks)
What you should know: This is not an activity for Wine Night, okay? This isn’t necessarily a hard project, but it is a little fiddly, so you’ll need all your faculties and plenty of time. Carving a pumpkin is a lot like what Grandma Shine says about plastic surgery: start early and do a little at a time. (We can talk about Grandma Shine later.) Don’t do this the night before your office pumpkin carving contest. Work in small areas. Don’t cut too much at once. Don’t do anything stupid with a knife.
Step One: Cut a hole in your pumpkin & hollow it out
Should you cut the pumpkin from the top or the bottom? Martha says that if you’re going to use a real candle to illuminate it, cut from the top. If you’re going to use an electric light, cut from the bottom. Whichever you decide, make a mark or cut a notch so you’ll know how to set it back into the pumpkin.
Hollow out your pumpkin. Take out all the pulp and seeds. (Roast the seeds if you want!) You will probably need to scrape down the walls to make them a little thinner, at least on the side where you’ll be placing the template. A big spoon works for this, or you may have a small scraper in your carving kit. The walls should be about an inch thick.

Step Two: Attach the pattern
Dry the outside of the pumpkin and then attach the pattern, laying it as flat as you can. You can use tape for this, but you can also use pins. It won’t lay perfectly flat, but that isn’t a big problem.
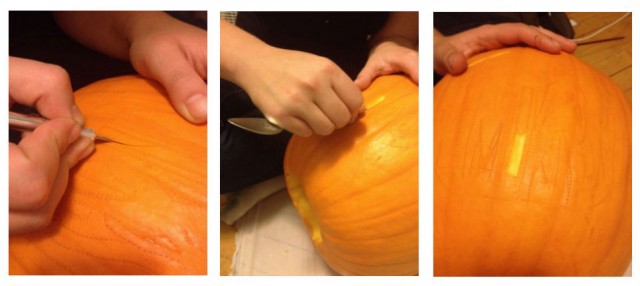
Step Three: Transfer the pattern
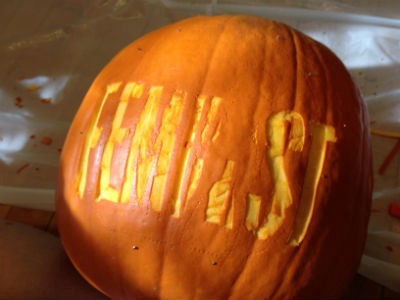
Now you need to transfer the pattern by punching holes into the pumpkin. Our pumpkin kit came with a little rotary wheel tool, which worked beautifully. If you need to use a pointy tool instead, make your holes very close together. Take your time with this: you really can’t make more than one set of holes, or you won’t be able to tell what’s what on the surface of the pumpkin. The template will get pretty soggy, so hold the area you’re working on in place with your hand. When you remove the pattern, you should be able to see the outlines pretty clearly. If it’s not legible, try applying the pattern again on the other side of the pumpkin.
Interlude: The more you know™
Next it’s time to carve the pumpkin! Wheeeee!! But you’re never going to cut all the way through the pumpkin–no holes. When you’ve finished, you’ll have three different layers in the surface of the pumpkin. (If you’ve ever made a reduction linocut, it’s a little bit like that. If you don’t know what that means, you can ignore it!) The lettering is cut the deepest, the area around the lettering and in the circle is cut more shallowly, and Beyoncé’s figure is not cut at all. Having a clean copy of the pattern to refer to can help: the deepest layer is in black, the next is in gray, and Beyoncé’s figure is in white.)
Step Four: Shave the skin off of the lettering
Before you cut anything or worry about depth or whatever, carefully shave the skin off of the letters. This makes it a lot easier to figure out what to cut and how deeply to do it. To do this, score the skin by carefully tracing over the letter outlines with your X-Acto knife or utility knife and then make shallow cuts to peel the skin off.
Step Five: Carve out the flesh of the letters
This is your deepest layer, so cut into the pumpkin’s flesh about a quarter inch, maybe a little more. (Is the first cut the deepest?) The best way to do this is by cutting in at an angle–not straight down!–and taking out small sections, then scraping the exposed flesh down with the end of a spoon or whatever to get an even surface.
(Isabella went to art school and is better at this than Jacqui is and didn’t need to take the skin off of the letters first. The end result is the same, though.)

There are some tricky spots to look out for–areas in which you have to be especially careful because they’ll be sort of fragile when you’re finished. They’re outlined in red. If you do accidentally cut off a chunk you need, you can pin it back into place with a straight pin.
Also, we both found carving around Beyoncé’s crotch very disconcerting. Be ready for these uncomfortable feelings.
Step Six: Carve off the rest of the skin
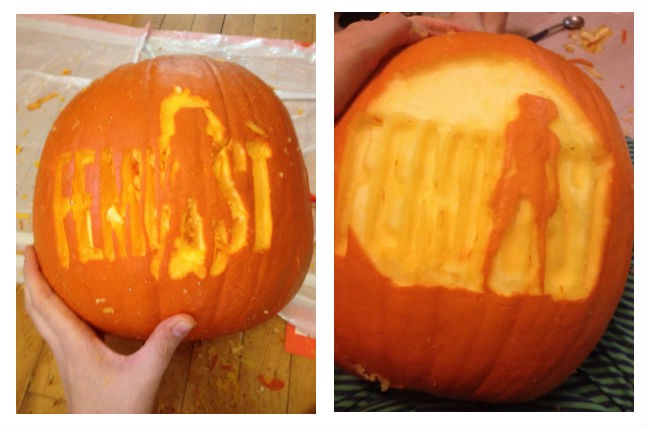
Now you’re going to create that second, shallower layer by carving the skin off everywhere else. You might want to carefully carve around the figure first so you create a buffer zone before you carve out the rest of it. When you’re finished, it will look something like the photo on the right. (Yes, she looks a little anemic/extraterrestrial, but it won’t matter so much once the thing’s lit from within.)
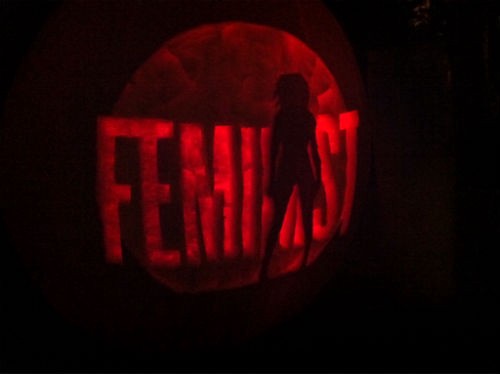
Step Seven: Light that thing up!
Take many photos, put them on social media (with the hashtag #BowDownWitches if you feel like it!), gloat. Now you can have a glass of wine.
If you want more light to shine through, you can (CAREFULLY) scrape down the inside of the pumpkin or shave off another layer of the exposed flesh.
Step Eight: Consider your (pumpkin’s) mortality
If you want to extend the life of your pumpkin, you can spray it inside and out with a diluted bleach solution (❤ u, Bleachie) and, if it starts to dry out, soak the whole thing in cold water with a little bleach overnight. According to this extensive science experiment, commercial pumpkin preservation spray (????? WIZARDS !!!!) is very effective.
Having sacrificed a seasonal gourd and praised her with fire, let the light from your Yonce-lantern forever guide you on your righteous path. Bow down, witches.
Isabella Rotman is a cartoonist and illustrator from Maine living and drawing in Chicago. Her art is usually about the ocean, mermaids, crushing loneliness, people in the woods, or sex. All of her self published comics are available in her online store. She is author of the sexual health comic You’re so Sexy When You Aren’t Transmitting STDs and the Artist in Residence at Scarleteen.
Jacqui Shine is a writer & historian who lives in Chicago. She’s written for The Sun, Slate, xojane, The Atlantic, The Awl, The Hairpin, Lapham’s Quarterly, and The Chronicle of Higher Education. When she’s supposed to be working, she’s playing the cello badly, doing weird embroidery, drinking coffee from her MALE TEARS mug, and talking to her cat. If you want, you can sign up for her newsletter.