The Lazy Person’s Guide to Canning
by Maria Mercedes Lara
It’s about that time of year when the canning trend pieces start popping up in newspapers and everyone starts thinking about getting on the preserving train but never really does. (Well, by “everyone” I mean casually crafty urban-dwelling young women?) Well, I’m here to tell you that canning is easy, so easy, and is something that can be mastered by even the laziest of ladies like, um, myself.
First, I’ll give you a quick rundown on the basics of canning. It sounds a lot more complicated when typing it out for internet readers, but the actual process is painless. After that, I’ll show you how to make a very simple blueberry jam. Perfect for impressing friends or making your mom giddy with excitement.
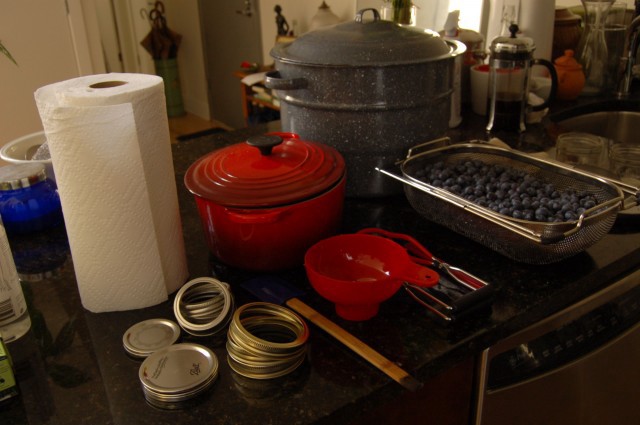
Basic canning equipment:
— Water-bath canner with a canning rack. If you can’t find a “water-bath canner” you can use a large stock pot and get your hands on a canning rack. (Make sure that your pot is tall enough to be at least 2 inches taller than your tallest jar.) This is the one I have.
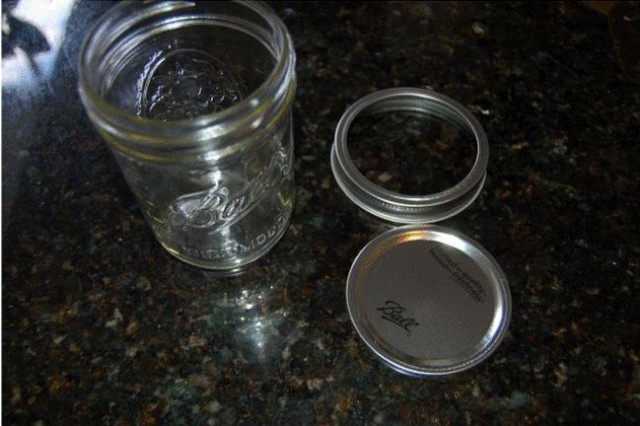
— Canning jars. I prefer Ball brand jars, but it’s up to you. Make sure they are safe for water-bath canning. You can buy these either in “regular mouth” or “wide mouth” — in general jam and jellies are for regular mouth jars, and sauces, pickles, and larger foods are better for wide mouth jars.
— Canning lids. These are the metal circles that go on top of the jar mouth. Always buy fresh lids every time you can!
— Canning rings or bands. These are the metal bands that fit over the lid and the jar mouth. These can be reused from previous canning jobs.
— Wooden or plastic spatula. This is for getting the air bubbles out of your jar before processing.
— Plastic ladle. For ladling.
— Lots and lots of paper towels. Jam-making is a messy, sticky business. You’ll need damp, clean paper towels for wiping off the rims of your jars.
— Oven mitts and/or thick silicone dishwashing gloves. For the love of god! Get these.
Optional (but they make your life so much better!)
— Food scale. Most canning recipes go by weight, and this makes it easier to match your recipe to the canning instructions.
— Jar lifter. These are funny-looking tongs that save you from dropping your jars and/or burning your hands when getting hot jars out of your even hotter canner. This and all the items below can usually be bought in “canning sets.”
— Jar funnel. A large plastic funnel that makes it easier to ladle your food into your jars.
— Magnetic wand. Don’t get excited. This is just a small stick with a magnet at the end of it. This makes it easy for you to get your jar lids out of hot water.
There are two different types of canning: Water-bath canning and pressure canning. Water-bath is the easiest to do, so we’ll be using it here. Why go nuts? This is canning for lazy people, remember? Water-bath canning is safe to can high-acid foods (foods with an acidity of 4.5 pH or less). What does that mean? Basically you can water-bath can most fruits and vegetables that have been put into a highly acidic solution (like pickling). You cannot water-bath can non-pickled vegetables, meats, or fish.
Some of you might be worried that canning isn’t safe. Canning, WHEN DONE PROPERLY, is safe. Now, just because this is a lazy person’s guide doesn’t mean that we aren’t canning properly. It’s just that proper canning is really so easy, even a lazy person can do it. It’s a lot easier than making a cake or something.
There are three important parts of canning that you want to perform in order to make sure your food is safe for eating. First, you want your jars to be sealed properly. A jar becomes sealed when the rubber part under the jar lid heats up in the water-bath process and is then forced to cool down rapidly when removed from the canner and left to sit. The intense heat plus the cooling process creates a vacuum seal with the lid. Magic!
Another part of ensuring safe canning is making sure that your food reaches the correct internal temperature when inside the jar. This is why it is really, really important that you only start counting your process time once the water is boiling inside your canner (this will make sense later). You also want to make sure you have enough water above your jars inside your canner. (Usually 2 inches of water.) This will ensure that the insides of your jars have enough hot water circulating around them to allow them to cook properly.
The last part is cleanliness. Make sure you wash and sterilize your jars before using them to can something. Make sure you keep the rims of your jars clean and always use fresh lids. Always use fresh, unblemished food for canning. And never, ever use old decorative jars or jars from items that you previously bought for canning. Old jars often have cracks and jars from store-bought goods might not be proper jars for canning, even if they look like it. Just go buy new fresh jars. They’re pretty cheap!
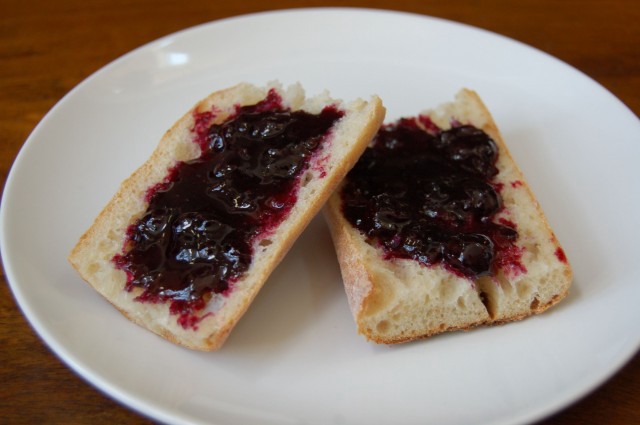
Now, on to our first recipe! I decided to start off with a very simple blueberry jam that requires no pectin. Pectin is an additive that you have to add to many fruit jams for them to get that jammy, jelly feeling. Since blueberries naturally have a lot of pectin, they don’t need the extra stuff, so it’s one less thing to buy. Also, blueberries are in season right now, so they’re also pretty cheap.
(Also I didn’t just make up this recipe — I adapted it from a trusted canning source. Even if you’re already an experienced canner, you should still follow recipes from trusted sources. The Ball Blue Book Guide to Preserving is the gold standard, but there are a lot of good sources out there.)
Blueberry Jam
(adapted from the U.S. Dept. of Agriculture’s Complete Guide to Home Canning and Preserving)
What you’ll need for blueberry jam:
— 3 lbs fresh blueberries (about 5 pints)
— 6 cups sugar
— ¾ cup water
Yield: 6 8 oz. half-pint jars
That’s it!
Additional equipment:
— 6 half-pint canning jars
— 6 fresh lids
— 6 can jar rings
— Jelly pot or large, nonreactive pot (I like to use a large Le Crueset dutch oven)
— Candy thermometer
— Large spatula
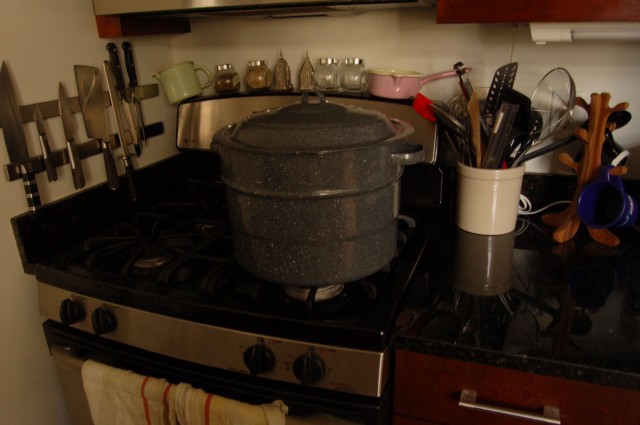
Step One: Before you do anything, fill up your canner with water and fire it up on the stove. Canners take forreevveer to start boiling and you’ll need it to be at least near-boil by the time you are ready to process your jars. Start it up now because it will take 400 hours to even start simmering. This is the only annoying part of canning.
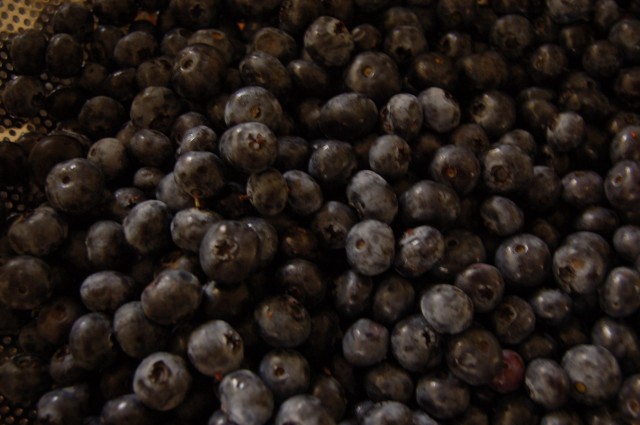
Blueberries preparing to be smashed.
Step Two: Wash and prep your fruit. Remove any stems and discard any blueberries that have bruises, cuts, or holes. Measure out 3 lbs. of fruit and begin crushing them with a potato masher or fork. Crush the fruit layer by layer. Set aside.
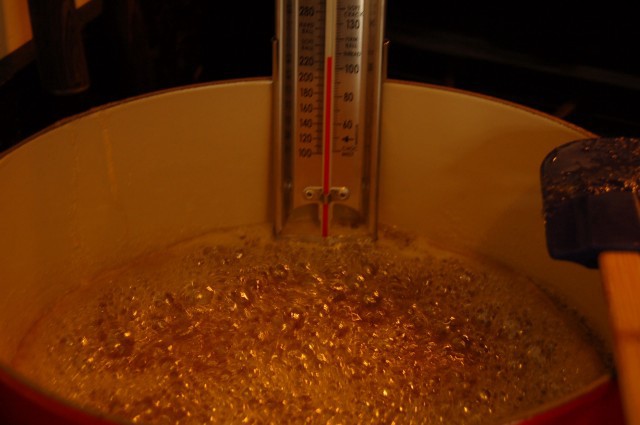
Step Three: Begin the jam-making process. In your jam-making pot, bring the water to a simmer. (This should be fairly quick.) Once the water is simmering, add your sugar and stir. Slowly heat up the sugar to 250º F/122º C, aka, the “hard ball” stage in candy-making. Stir often to avoid having the sugar burn. Your sugar should be boiling and making a lot of nice little bubbles.
Step Four: By now, your water bath canner should be starting to boil. Sterilize your clean jars by placing them in the water-bath canner for at least 10 minutes. Meanwhile, start a small pot of water on another burner on the stove and bring it to a simmer. Place your jar lids (but not the rings) into the pot. Simmer your jar lids for at least 10 minutes. This will make the rubber parts of your lids get nice and soft.
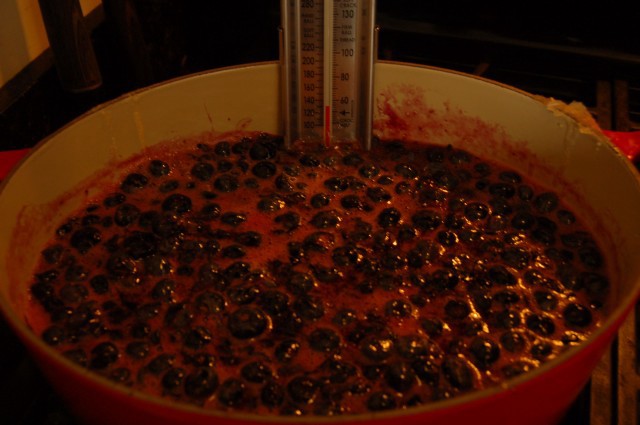
Step Five: Add your crushed fruit into the sugar mixture and stir again. Bring the mixture up to a boil and let softly boil for 15 minutes. Your fruit mixture should look like a thick syrup at this point. Keep in mind that this stuff will get thicker after the water-bath process. Once the mixture reaches desired level of jammy-ness, turn off the burner and remove the pot from the stove.
Step Six: Your jars should be sterilized by now. Multitasking! If your jars aren’t ready, that’s fine, just sterilize them now and keep your jam mixture simmering while you wait. Remove the jars from the canner and place them on a clean towel. Remove the hot jar lids from the stove and place the pot on a trivet or towel next to your jars.
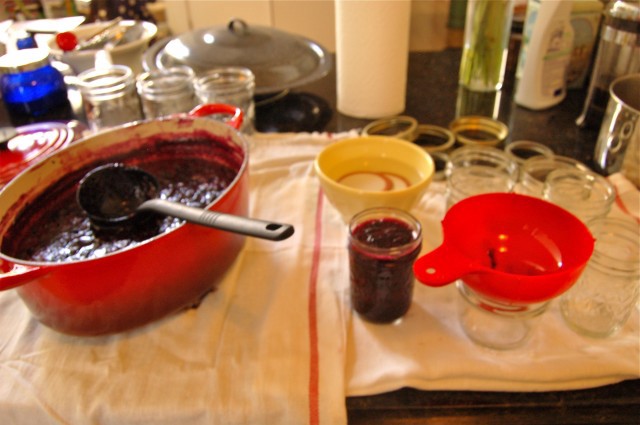
Step Seven: You are now ready to can! Ladle the hot jam into the hot jars, leaving ¼ inch of headspace. Once you have filled a jar, immediately stick the small wooden (or plastic) end of a spatula handle into the jar and run it around the inside of the jar. This is to make sure that all the air bubbles are out of the jar. After you are done, immediately wipe the rim of the jar with a clean, damp paper towel. Using a magnetic wand or tongs, get the jar lids out of the warm water and place one on top of your jar. Place a metal band around the jar and screw gently, not tightly. Repeat this process with all the jars. If this process sounds really complicated, it’s not. Watch this great video about canning and see how easy it really is.
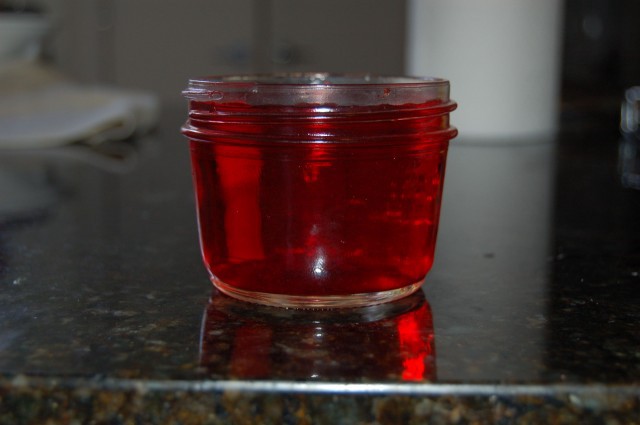
Example of ¼ headspace on half-pint jar.
Note: If you have leftover jam, put it into a plastic container or a leftover jar and keep it in your fridge. You can eat this immediately and don’t need to process it.
Step Eight: Using a wire canning rack, place your jars into the water bath canner. Make sure that there is at least 2 inches of water above your jars. (Add boiling water if needed.) Bring the water up to a rolling boil, cover, and process for 10 minutes. Once done, turn off the stove, let the water stop boiling, and remove the jars from the canner using a jar lifter or tongs. Set aside on a counter to cool for 6–12 hours.
Step Nine: Test your seals! Once the jars are completely cool, you should test the seals. Often, jars will make a “pop!” sound while cooling, which is good since it means they are sealing correctly. Push down on the middle of the lids and see if the middle pops back up. If it doesn’t pop back up, the jar has been sealed correctly. Congratulations! If it does pop back up then your jar has not been sealed correctly. Move the jar to the fridge and use immediately or discard.
Step Ten: Label your jars with the date and contents and move them to a dry, dark place. I like to keep mine in the back of a closet or under my couch. Yes, it is weird, but it works!
This whole process, from start to finish, will take up a good chunk of a day, but you don’t need to be slaving over the stove for most of it. Watch that Walking Dead marathon while you wait for your water to boil. Browse the internet while your jam processes. It’s easy.
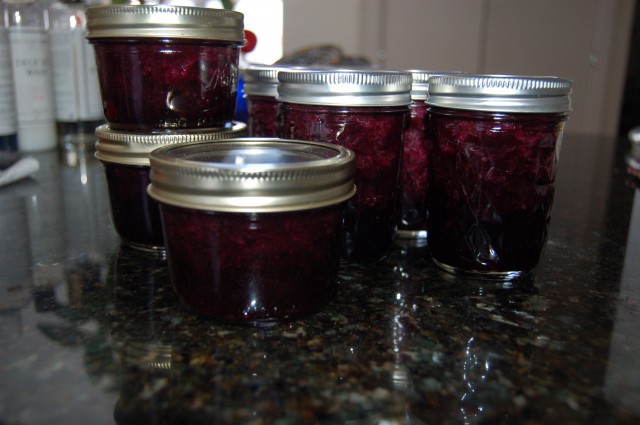
Jam that has been properly canned will last for up to one year.
Now you know the very basics of canning. You can strut around your local farmer’s market with confidence and ease, knowing that you — yes you! — are capable of canning. You can give your canned goods out as gifts to your friends and loved ones and smile with pride as they fuss over your fancy foodstuffs. Little do they know that it is actually a very easy thing to do. Shh, don’t tell them.
Maria Mercedes Lara is an editor at Wetpaint. She cans while watching Law & Order: SVU reruns.