A Femme’s Guide to Improvement: Very, Very Serious Ornaments
by L M

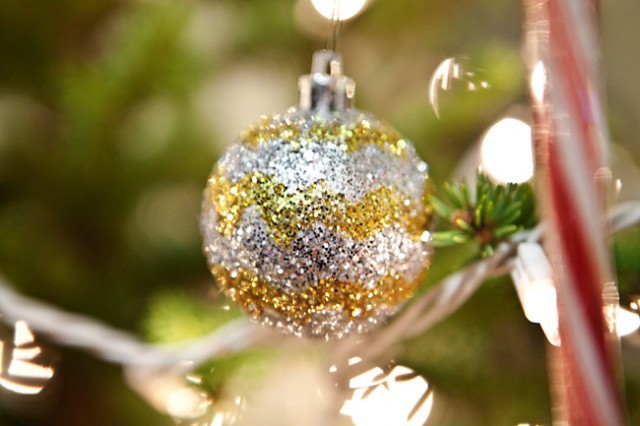
Last week’s post on how to decorate your head with glitter was possibly a tipoff that I really like glitter. A lot. (And so do you guys, if Pinterest is any indication of what Hairpinners like.) It should come as no surprise, then, that upon getting my first REAL tree as an adult, I promptly turned it into a disco ball. And when that wasn’t enough of a glitter fix, a snow globe was the natural next project.
First up, let’s make every ornament in your holiday decoration box glittertastic! You’ll need:
- Ornaments, obviously.
- Glue — Elmer’s or any similar craft glue will work.
- Glitter.
- A small brush — a lipstick or any small makeup brush is perfect for this.
- A bobby pin or toothpick.

First things first: don’t try this on a shiny glass or plastic ornament. The glue won’t stay in place, blobbing up in puddles instead of whatever you try to draw. Start with a matte-finish surface. If, however, you only/already have shiny things you want to glitter, rub a thin layer of glue all over the surface as a primer. You have to keep spreading it as it dries — use your fingers for this — and that should give you a good base. (This is also a good time to re-live being bored in fifth grade and spreading glue all over your palm really thinly to see if you can peel it off in one piece and make an imprint of your hand. So. Fun.)
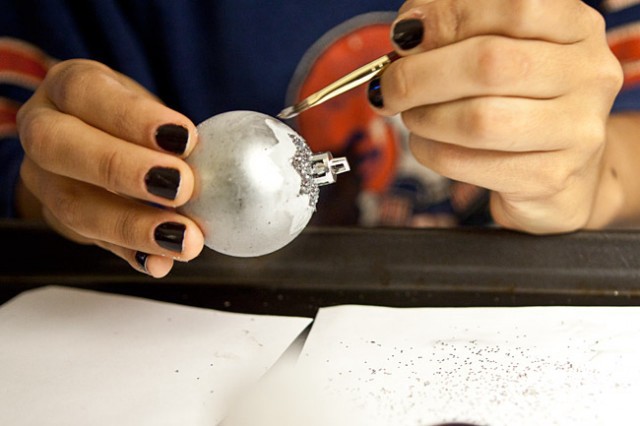
Next, pick a pattern — zig zags, stripes, polka dots, whatever — and start painting it on with the glue.
Once you have the glue down, just sprinkle on the glitter. You can either go one row at a time, as I’m doing here, or do a bunch of rows of one color at a time and, after glittering, go back and do the next color you want to fill in between the rows. If you want to do a lot of tiny stripes in tons of colors, like on this Anthropologie ornament, go ahead and cover the whole ornament in stripes of a couple colors, and once they’re dry go back over them using a toothpick or straightened bobby pin to paint smaller lines of glue over the first layer of glitter. Then just sprinkle on your other colors!

Next, a snow globe, something I don’t think I’ve had in the house since visiting Disney World in 1990. You’ll need:
- A mason jar.
- Some kind of figurine.
- Waterproof glue (rubber cement or Shoe Goo is perfect).
- An empty white yogurt container.
- A binder clip.
- Glycerine (about $4 for a bottle at the grocery store).
- Glitter.
- Four hardboiled eggs.
- Mayonnaise, Dijon mustard, paprika, sliced bread.
- Cold boiled or distilled water.
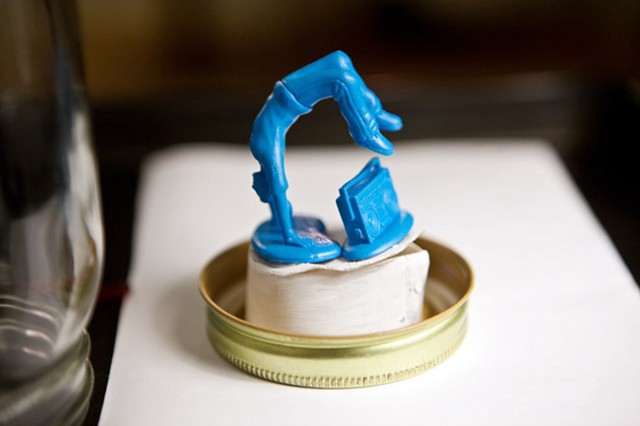
First, make the base for your figurine by cutting out a circle from the base of the yogurt container and a rectangular strip from the side. Make a cylinder out of the strip, glue and clamp in place with the binder clip, and glue the circle to the top. Then stick your figurine on top. (I went with a breakdancer from Kid Robot, because duh.) Once the glue is dry, unclamp and glue it to the lid of the mason jar.
Next, peel your hardboiled eggs carefully. There’s a membrane between the egg and shell: remove it, and throw it away. Yes, this is painstaking and yes, you have to do it, otherwise you’ll have gunk floating around in your globe. Put the shells in a small bag and crush them into tiny pieces, then put them in a glass and rinse them with cold water. (Fill the glass slowly, drain, and repeat.)
Pause, use your mayo, dijon, paprika, and eggs to make an egg salad sandwich. Eat it. Your glue’s drying anyway, it’s not like you have other things to do.
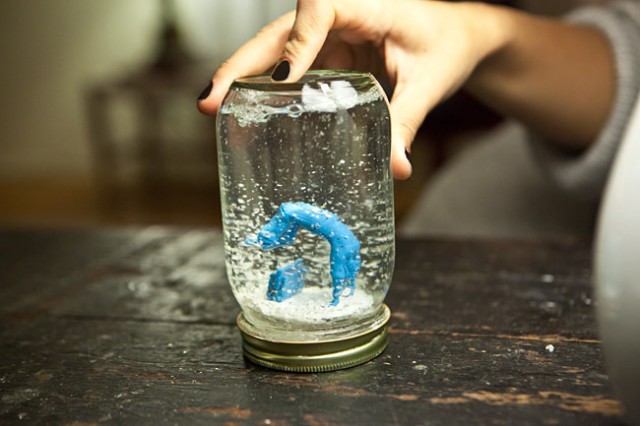
Once the glue has set, put the eggs and some glitter in the mason jar and fill it almost to the top with your (now cold) boiled or distilled water. Add a few drops of the glycerine and stir. (You don’t have to have this, but it slows down the shells as they fall in the water. Don’t use mineral oil, don’t use flaxseed oil, don’t use any oil, because it will just stick to the glitter, stick to the figurine, and not do anything to the water. Why on earth some people insist on this is mindblowing to me, since, you know, oil and water. I tried it, just in case, and no, it doesn’t work. It just makes a mess and wastes mineral oil that should be going on your wood cutting board instead.)
Line the outer mouth of the jar with glue to make a waterproof seal and screw on the lid. LET IT DRY. I know you’re impatient, but you have to let it dry. Completely. Is it completely dry? Yes? Now you’re done.

Previously: A Femme’s Guide to Improvement: Arm Candy and Too Much Glitter.
Lucia Martinez reads too many old poems and tries to be a lady.
Photos by Helen Pearson.