A Femme’s Guide to Improvement: Flower Ghosts & Felt Sleeves
by L M

Y’all. I’m on some kind of crazy décor kick right now, even though it’s not nesting season, which according to my very arbitrary internal clock is January-March or whenever winter wanes. Next week’s project will be drywall repair and things’ll be properly gay and there will be power tools and sandpaper and all that jazz, but right now the temptation to make a wool cocoon is almost overwhelming. Almost, but these two quick, easy, and very cheap projects gave me a fix. Wool flowers and felted wool iPhone/Pad/tablet sleeves!
Dandelion ghosts (is that what they’re called? This is what I’m calling them) are one of my favorite things, but they’re so damn ephemeral that getting them anywhere is impossible. And then once you do, someone sneezes or opens a window or uses them as a cat toy and they’re gone forever, except for the bit that got stuck in your eye. Using a bit of bulky wool and some twigs, you can make your own, allergy-free ones, and it takes all of five minutes.
You’ll need:
- Yarn (your choice of color, but make sure it’s bulky and fluffy)
- Twigs
- Scissors

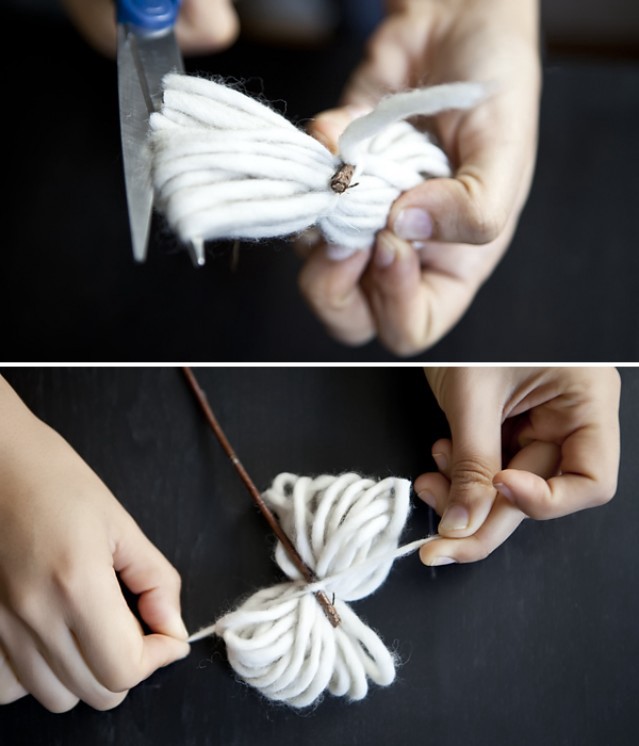
Wrap the yarn loosely around four fingers, a minimum of ten times. The bigger you want your dandelion — maybe you like a giant tree-sized one, who knows, I’m not judging you for liking oversized things instead of miniature ones, even though everyone knows miniature things are better than basically anything else ever — the more times you’ll want to wrap it around. Remove your yarn bundle from your hand and snip the yarn, and then cut another piece about six inches long. Tie it tightly around the middle of the bundle.

Next, tie it to the end of a twig with a double knot. Slip your scissors through the loops of the yarn bundle and cut them open. Trim them a little — they’ll be easier to work with in the next step.
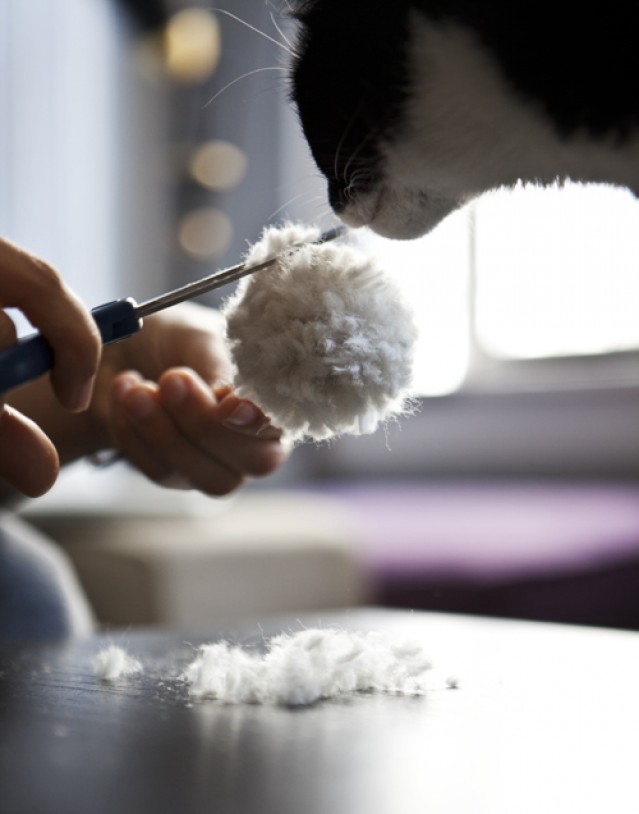
Use your fingers to separate the yarn fibers, fluffing and pulling them apart.

Your cat will probably get really interested in the yarn at this point, and your beagle will decide he wants to eat your twigs. Wave the scissors at them menacingly, muttering threats to take away boxes/deny all future treats, and proceed to trim your fluff ball until it’s the size you want. You’re done! Repeat until whatever episode of House or The New Girl you’ve been watching is over.

Next project! Because everyone loves a good felted electronics sleeve, and no one should have to pay $30. (The total cost of mine came in at $3.)
You’ll need:
- Woven (not stretchy) 100% wool/cashmere/similar animal fiber fabric
- A needle and thread
- A scrap of leather — old belts and purses work well for this
- Some pins
- Maybe a boxcutter; definitely scissors
Some people use felted wool from sweaters — i.e. sweaters that have been washed, dried, and matted up a bit in the process — but the resulting textural irregularity always looks a bit elementary crafty to me, so you’ll want a woven wool. Knit wools stretch, woven wools don’t. You can either get a half yard from the fabric store (that’s usually the minimum cut) or get an old wool blanket from an army surplus/thrift store. Felting from fabric is pretty easy and mindless: Throw it in a washing machine on the hottest cycle, and then tumble dry on medium heat. No machine? Put it on the stove in an old pot, let it simmer for 20 minutes or so and sit in the hot water for another 40, squeeze out the excess water. (Put a lid on the pot, because wet wool stinks; it’s a proper reek, not a faint odor.) Once it’s mostly dry, hit it with a blow-dryer to shrink it a little more.
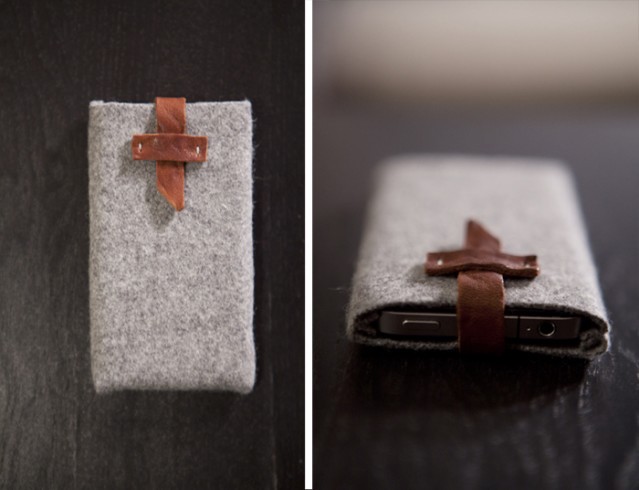
Decide which side you want to be the right (outside) of your sleeve and fold the fabric over whatever you’re sleeving (there must be a better verb for this) right side-in. Pin it snugly in place and then trim away your excess felt, allowing a half-inch of clearance on the sides and barely any on the top. (The bottom will be closed already from the fold.) Remove your gadget and, with a machine or by hand, sew up the sides. If you’re sewing by hand, double your thread and use a backstitch: stitch forward once, and then instead of going straight forward, go halfway back over the previous stitch. (A one step forward, two steps back kind of sitch. Or stitch.) Once you have both sides sewn, snip the felt open at the bottom so that the seams can lie flat. This is all you have to do: the felting process will keep the wool from fuzzing or unraveling.

On the leather end of things, you’ll need two strips, which you can cut with a boxcutter and ruler, as shown, or with scissors, if it’s not terribly thick. Mine are 3” and 1” long, and just shy of a half-inch wide. (Or a centimeter, because hey! Why not mix and match measurements?) Using a thick needle, thumbtack, or small awl, poke two holes in each end of the shorter strip and stitch it to the front; do the same on one end of the longer strip, and then an inch from the same end of that strip. Use these holes to stitch the longer strip to the back of the sleeve, so that it reaches over to the front. This is just a basic template: for a bigger sleeve, you could cut a really long leather strip, so that it wraps around the sleeve a couple times. Super easy, and once you have the felt made, they make great little presents!

Thanks to Helen Pearson for the photos!
Lucia Martinez reads too many old poems and tries to be a lady.