A Femme’s Guide to Improvement: Fabric-Covered Walls
by L M

By now, my little Nillionaires, you may have read all about Edna Woolman Chase’s Always in Vogue. Fun fact: Vogue’s only Quaker, budget-conscious editor didn’t only leave us with cheap wardrobe tricks. We get decorating tips too, because, hey! Guess what? One of her BFFs was Elsie de Wolfe, Lady Mendl, the first interior designer as we know the profession. No biggie.
In Brookhaven I fell in love with a little house a mile or so away from the one belonging to Claire and Bow and Ida Haskell. It was about a hundred years old, simple in the extreme but picturesquely placed under two magnificent hickory trees. With some imagination, very little money, and Claire’s help I was able to convert it into a gay summer home. We did one trick that turned out very successfully and I’ve always thought it might be of interest to other people, low in funds, if they had to cope with cracked or badly discolored inside walls. I couldn’t afford to paint, so I bought bolts of cheese cloth that we cut into strips the height of the rooms. These we doused in tubs of water, and Claire taking one end and I the other, we wrung them out and left them, fat, twisted skeins, to dry. When they were dry we shook them and stretched them from ceiling to floor and nailed them in soft pleats top and bottom. We laid half-round moulding over the nails. The walls immediately became pleasant, self-effacing backgrounds for flower prints and furniture. The major job of redecorating was accomplished for about ten dollars.
Cheaper and less messy than paint, washable, removable, portable, transferable, you get the idea. You can do it Edna’s way — fairly straightforward and permanent — or, with a few modifications and that modern miracle, Velcro, make it removable! Mine’s a (sliiightly crooked) sample of three panels; yours can be straight and an entire wall or room. Here’s how to make a fabric-covered wall and not have it look like it was done by Half-Baked’s batik-loving set-dresser.
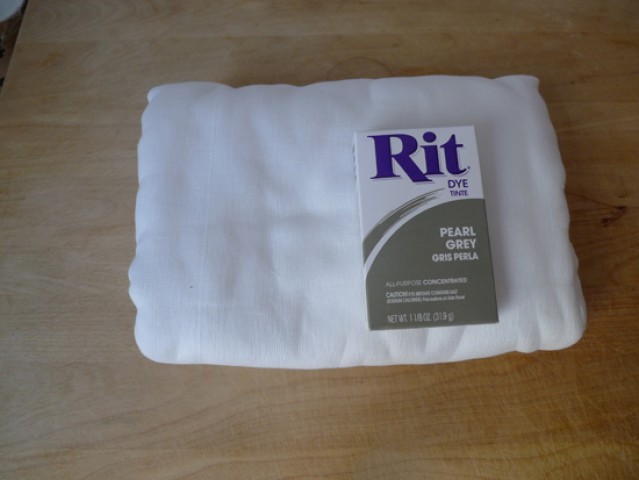
You’ll need:
- Cheesecloth — cut by the yard
- Thin wood strips/molding
- Stick-on velcro
- A staple gun
- Optional:
- Fabric dye
- Needle & thread
Make sure you get cotton cheesecloth, not synthetic; if you get it by the yard, it’ll usually be cotton anyway, but make sure. It comes in different weights — the greater the weight, the higher the price — with 50 being the ideal for this project. Working with a 9-foot ceiling, three yards of fabric will cover three horizontal feet of wall if the fabric is stretched tight. Sixty-six yards will cover a 12 x 15 room, pleated. Amazon and Ebay have plenty of options, and they’ll keep your price down: The more you buy, the less it costs. A 10-yard bundle averages at $1.50/yd., a 100-yard one $0.50/yard, so let’s say that a 12 x 15 room ($20 for wood stripping, $10 for velcro, $5 for dye) will be about $70ish, give or take, depending on where you live/buy. Up slightly from Edna’s $10, but not as up as inflation from 1954.
1. First, cut lengths of cheesecloth the height of your walls, plus six inches. If you’re dyeing it, be a little more generous to allow for shrinkage. If you’re not, you can either skip the next step and go to step 3 for pleated fabric, or 4 for unpleated.
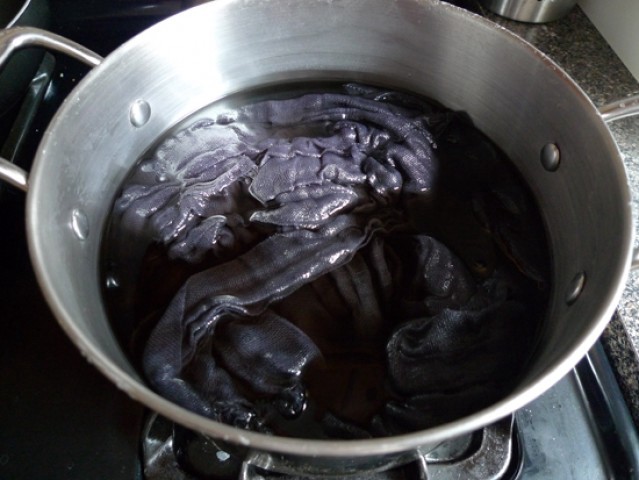
2. Dye it! Machine dyeing is a no-go here, because cheesecloth is too delicate. (Unless you’re into giant, webby, soggy tumbleweeds, in which case, do your thing.) Stove-top or bucket dyeing, please. I don’t particularly mind color variegation and didn’t stir too much, which is why my gray looks how it does. For an even finish, unfold the fabric before dyeing, soak it in water, and then put it in the dye bath, stirring constantly. I used Rit powder in pearl gray, with a half-cup or so of salt to help make the color as strong as possible. Let it soak for an hour or so, and rinse until the water runs clear.
3. Take your wet cheesecloth (dyed or original recipe) and, using either a friend or your oven door to hold one end still, twist and twist and twist until your cheesecloth rope twists back on itself, like so:
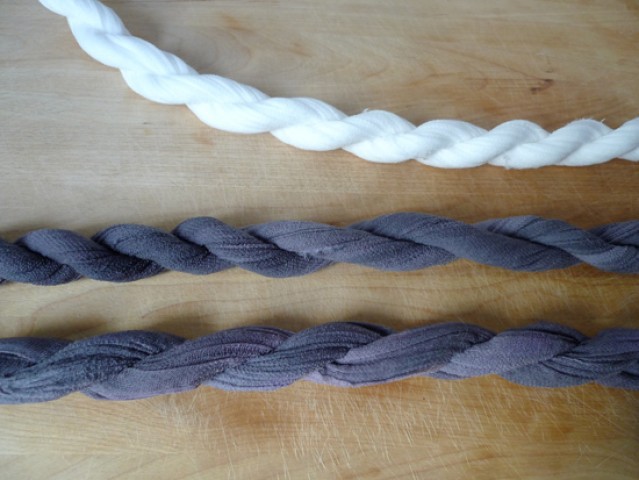
Let it dry in the sun/overnight, or, if you’re the instant gratification type, put your skeins in old pillowcases and pop in the dryer on low. (You have a dryer? In your house? What am I doing wrong with my life?)
4. Staple the ends of the cheesecloth to the molding. If your local hardware store is like mine and the lumber department consists entirely of dowels, you can use yardsticks that you’ve painted white or whatever other color you want. (Neons might be fun, if the cheesecloth is plain white.) For pleated fabric, overlap your panels by three inches or so to avoid gaps. Like I didn’t do.
5. Staple the loop (i.e. soft) side of the Velcro to the molding. This way, if you ever need to wash the panels — city life gets dirty, you heard it here first — by dunking them in the tub, the Velcro won’t lose any grip.
6. Stick the hook side of the Velcro on the loops and peel off the backing. Turn the molding so that the sticky part and the cut edge of the fabric are facing the wall. Press it firmly against the top and bottom of the wall until it sticks. For those of you working with unpleated fabric, you’re done! Great job!
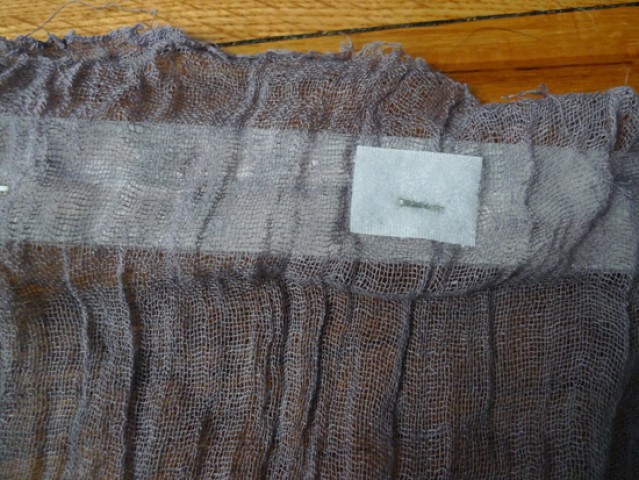
7. Pleated fabric needs one more little step, if there are gaps showing between the panels. Stitch them together loosely: One stitch every six inches should be enough to connect them completely.
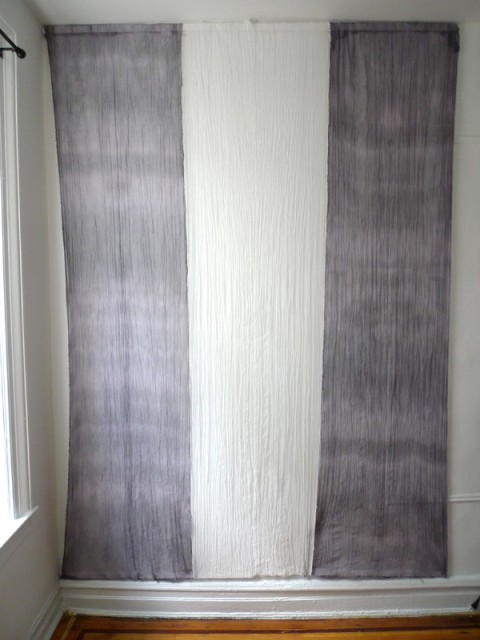
Bam! New walls! And you didn’t have to drape everything in plastic and dropcloths! What other things do you guys do to cover your walls?
Previously: Advanced Finger Painting.
Lucia Martinez reads too many old poems and tries to be a lady.