Make Your Own Stationery: Pop-Up Cards
by Katy Kelleher

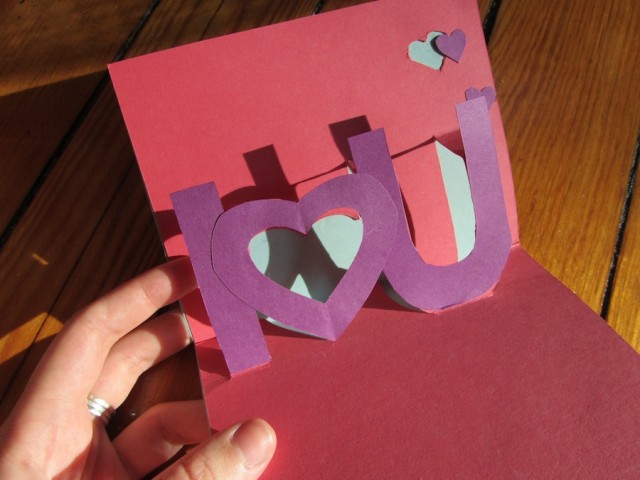
Since you’ve already mastered heat embossing, it’s time to move on to the next big thing in creative stationery: pop-up cards! Though they can be a bit time consuming, pop up cards aren’t all that difficult, and the same principles apply to all manner of cards. Though the ones I’ve made are all colorful and cheerful, you could also make something a bit more subdued by subbing in white paper (a white-and-red “I ❤ U” card would be really cute). Interested? Dust off your X-acto knife, crack open a fresh glue stick, and let’s get started.
But first things first: materials. To make these cards, you’ll need: colored cardstock (or do like I did, and just buy some blank cards), text-weight paper (get a variety of colors), an X-acto knife, scissors, a glue stick, a pencil, and a really good eraser. That’s it!
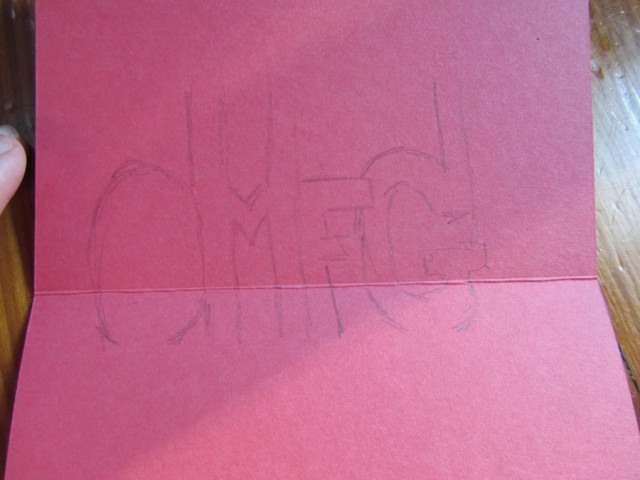
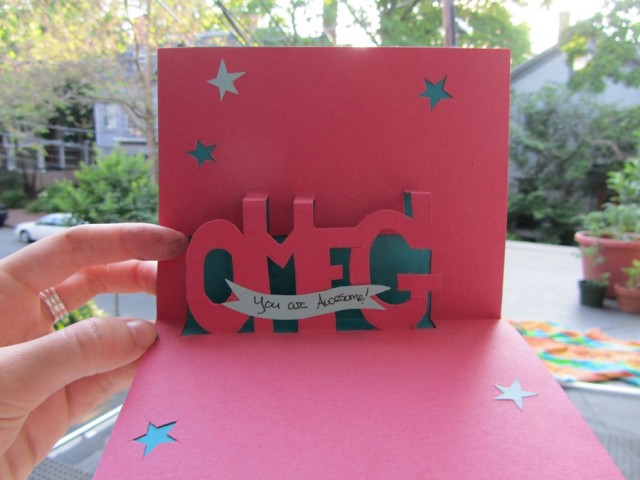
Start by folding your cardstock in half (if you’re not using a pre-folded card). Then draw the outline of the pop-up section on your paper, making sure it lies across the crease. I used a pencil and very lightly drew the OMFG text. You want to extend the letters higher at the top on both the M and the G, because they will provide the horizontal connectors for your pop-out piece.
Take your knife and start cutting along the lines you traced. While I normally endorse drinking and crafting, now is a good time to put down the wine glass. Handling an X-acto knife is perilous even in the best of times, and you don’t want to end up with cuts all over your hands and blood on your cards. But if you find yourself throwing booze-fueled card-making party, make sure you have Pretty Things beer on hand. (It’s delicious, and it goes with the theme.)
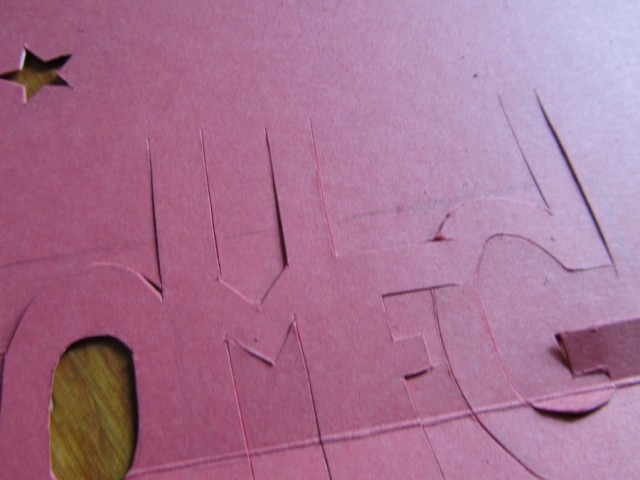
At this point, you’re going to want to erase all the pencil marks you made before you start perfecting the cuts and creases and whatnot. Use a good, un-smudged eraser, but if there are a few scuff marks, no worries. You can just glue some nice paper on top of them to cover it up.
Lightly draw a box around the pop-up region in pencil and cut a square around it. This will make your text more visible against the contrasting-color background.
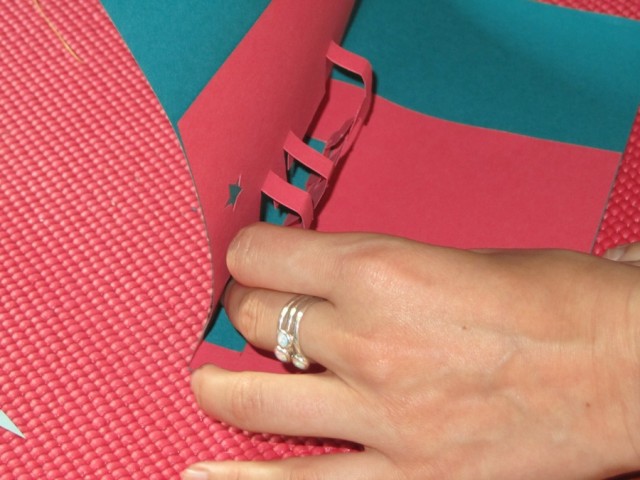
Now push the part you’re going to make pop-up out of the card. This is the trickiest step because you are forcing the paper to go against the existing center crease. Make sure all the connecting pieces fold at the same midpoint and crease the top and bottom connecting parts of the cut-out. As you close the card, be very careful to make sure the folds at the top of the text (above the M & G) line up.
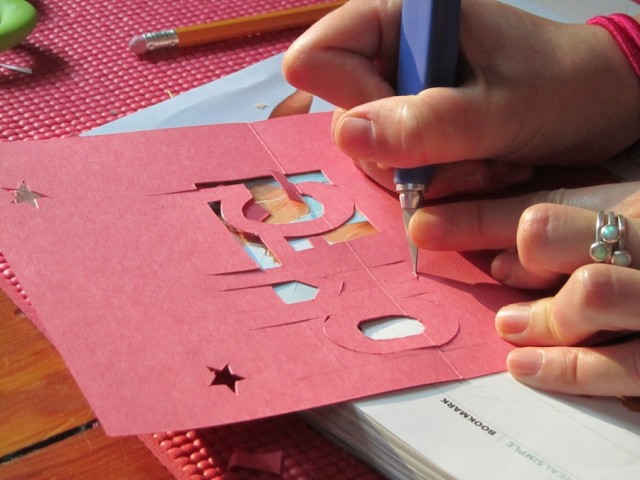
Now it’s time to glue the back piece on. Of course, you can use the same color for both pop-out and backing, but I like to put a new color behind it; I think it makes the card a lot more interesting. If you think you need to do any more cutting, do it before you glue. I cut out a few stars, but you can always get ambitious and do a message or something cute like that.
Completely cover the back of the card with glue, avoiding the letters and their connecting pieces. Press the second piece of paper down smoothly onto the glue, applying pressure to ease out any wrinkles. Trim all edges that fall outside. If you have a paper-cutter, use it now.
All right, you’ve made a pop-up card! But while you’re basically done, this is actually the most fun part of all, where you can add silly accents like drawings, cut paper decorations, and personalized messages. With this card, I decided to go with a few more stars and a little banner with a heartfelt compliment. You can also decorate the outside of the card — I used the cut-out paper stars I made when I was working on the inside of the card. Nice paper is expensive, so it pays to recycle!
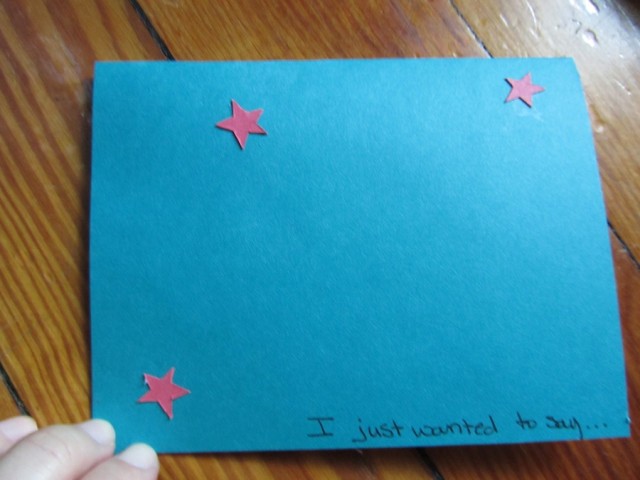
Here is the outside of the card. I kept it simple because the inside is so punchy.
And this is the inside, complete with the aforementioned banner and star decorations.
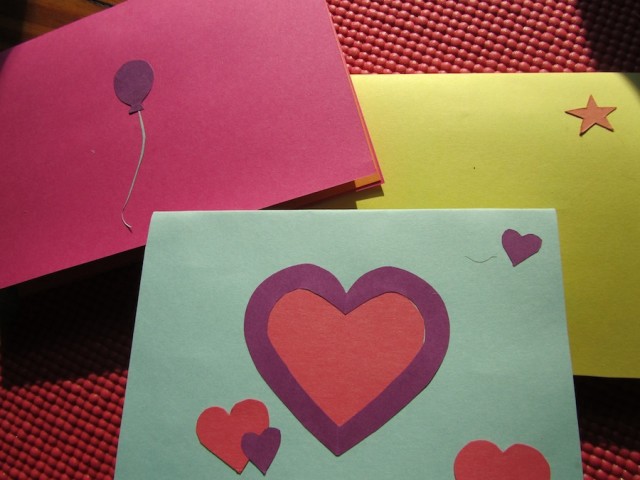
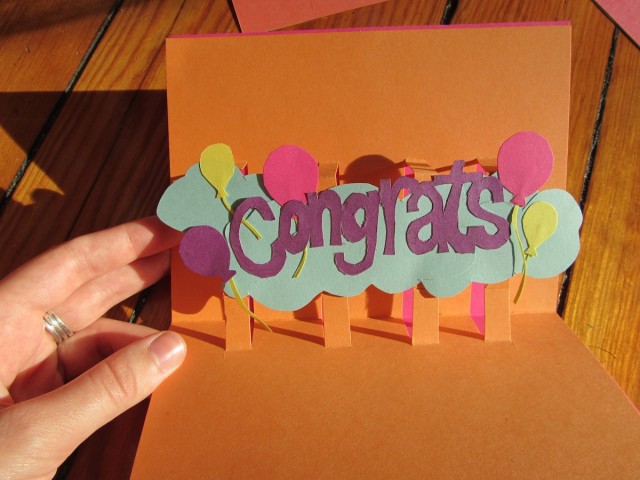
Now that you’ve got the basics down, feel free to heat emboss the crap out of that sucker. Or add some patterned paper, or write whatever supplementary message you want (as if “OMFG You Are Awesome” didn’t say it all, right?). Here are some other cards I’ve made over the past few weeks. I reuse a lot of scraps from project to project, which explains the similar color-scheme. Apologies if it gives you Lisa Frank-style Middle School flashbacks — even if that was kinda the plan!
Katy Kelleher is a nightlife writer for NBC. She spends her free time playing with paper.