Chill Out, Eat Key Lime Pie
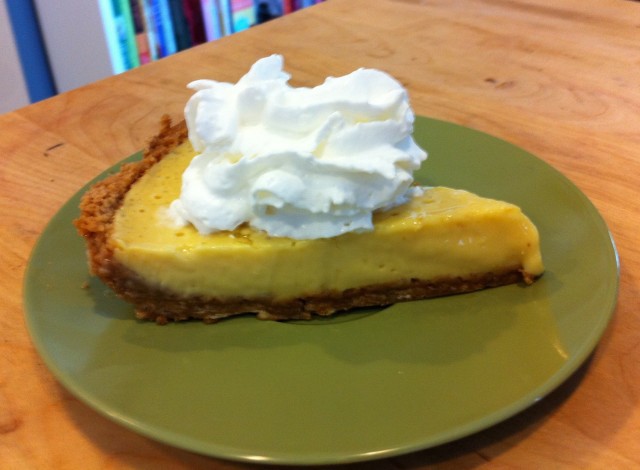
Summer is so warm and beautiful, and everything is all sun and fun. Bad things don’t happen during this glorious season. No one has time to be depressed or stressed because we’re all way too busy looking hot in sundresses and drinking fruity cocktails outside while our vitamin D levels soar. Right? Hahaha, nope!
Despite my continued belief that everything should be 110% perfect during the warmer months, it never seems to happen. And, if my Gchats this week are a reliable indicator, the lovely weather and longer days have done nothing to stop us from being displeased with our lives. We are still fighting with loved ones and working in windowless rooms. We are still waking up with frighteningly large blemishes on our faces. And some of us are still wearing flip-flops more than we should because we’re too lazy to wear grown-up shoes, which makes us prone to catching the toes of said flip-flops on the subway stairs, leading us to trip and sort of fall against the wall and then, of course, the train comes by at the exact same time and lifts up our skirts while our hands are too busy bracing us from our almost-fall so our pasty white thighs are exposed for all the rush hour crowds to see. At least that is what I have heard can happen when you wear flip-flops.
Anyway, my point is that summer can be a real bitch. And being stressed in the summer is even more frustrating than normal because you feel like you should be relaxing poolside at some fancy schmancy beach club instead of inspecting your grey hairs trying to figure out whether they look like highlights. BUT, let’s not totally lose our shit. Things could probably be worse, and it is really nice out, and there are some three-day weekends coming up. All we need to do is take things one day at a time and calm down a little bit and enjoy some pie and soon summer will be back on track. Did I just say pie? Yes, I did! I have a special stress reduction key lime pie recipe for you that will both dissolve your angst and give you a taste of the joy of summer and possibly also solve the dilemma of what to give your dad for Father’s Day. (It’s a proven fact that dads love pie.) Take a deep breath, and let’s pull ourselves together and make this calming version of key lime pie.
First, a word: There are approximately 9,387 versions of Key Lime Pie, and each one claims it is the most delicious or authentic or whatever. I was in Key West this winter and had pie every place I went and not one of them was the same. So, I don’t think there’s one authentic version and also who cares? To each his own, etc. I happen to like my key lime pies extra tart, and I don’t like any crazy stuff in them like coconut or chocolate. I am not opposed to a meringue top, if someone else wants to make it for me, but when I make my own I like to keep it simple. So, this is the recipe I love most because it’s easy and delicious and everyone I have served it to has gone crazy for it. But, if there is some other variety you like better, then by all means feel free to apply the stress-relief principals from this version to your own recipe. OK, let’s do this!
Here’s what you’ll need:
For the crust:
– 8 to 10 graham crackers (This is usually how many are in one of those wrapped packages inside the box of graham crackers. In the end, use as many as you need to have between 1 ¼ to 1 ½ cups of crushed crackers.)
– 2 tablespoons of sugar
– 6 tablespoons butter
For the filling:
– 1 14-ounce can of sweetened condensed milk
– 4 egg yolks
– 1 bag of fresh key limes (They come pre-sealed in a package with enough limes to yield between ½ and ¾ cup of juice.)
A note about the key lime juice: If you can find fresh key limes in your grocery store, I definitely recommend squeezing the juice yourself because it is delicious. But if you can’t find key limes, you can always use bottled key lime juice (sometimes found in the seafood section of the grocery store or in the regular juice aisle). You can also, if you’re in a total pinch, use regular lime juice, but it won’t taste quite as wonderfully perfect.
For garnish:
– Whipped cream
Here’s what you do:
– Preheat the oven to 350 degrees. Get out a 9-inch pie plate.
– First, you’re going to need to crush the graham crackers. Put the crackers in a large Ziploc bag. Seal the bag well. Then, spend a moment summoning whatever it is that is bringing negative energy into your life. In your mind, put that person or thing’s face on the bag, and then take a rolling pin (or other heavy, unbreakable object) and beat the living crap out of the bag. Continue doing this, flipping the bag over and moving the crackers around a few times as you go, until the crackers are finely ground. You want there to not be any super large chunks remaining, but be sure to stop before they’re pulverized completely into dust. Feel better? (You can also do this in about 30 seconds in a food processor, but that it is not as therapeutic.)
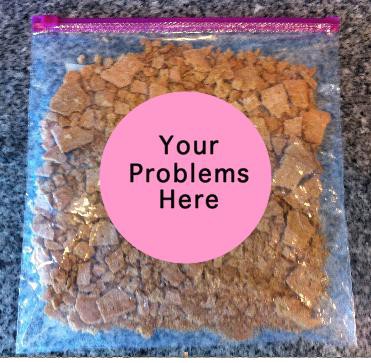
– Now mix up the crust. Dump your newly-pummeled crackers into a bowl. Melt the butter. Then add the sugar and melted butter to the crackers and stir until it’s all well combined. (If you’re using a food processor, just keep the crumbs in there, and add the sugar and melted butter. Pulse it until it’s evenly moistened.)
– Dump the moistened crumbs into the pie plate. Using your hands, spread the crumbs around so they’re evenly distributed over the bottom of the plate and a little bit up the sides. Then, using a glass or other flat-bottomed thing (like a measuring cup), press the crumbs down all around the pie plate. At first it will look like there’s not enough to cover the whole plate, but once you start compressing it all, there will be. You’ll probably have to just use your hands to get the sides flattened and evenly spread. It doesn’t have to be perfect, but try to make sure that the crust is of more or less the same thickness all around so it cooks evenly.
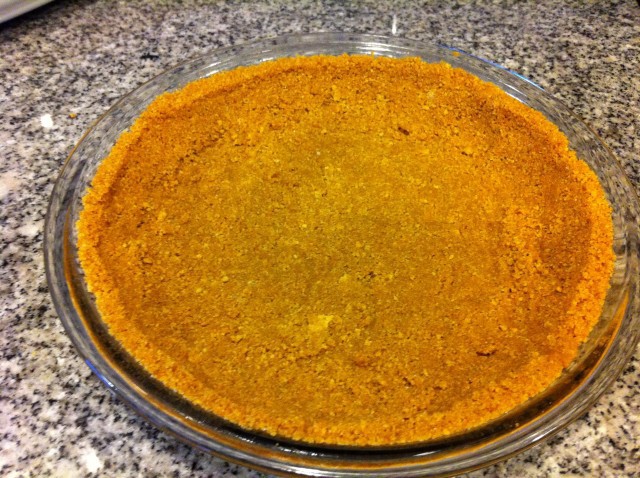
– Put the crust in the oven and bake for about 10 minutes. It will start to smell good and turn a little golden. While the crust cools, leave the oven on and make the pie filling.
– First, you need to squeeze your key limes! They’re tiny little buggers, so they’re easy to juice. Cut them in half. Picture that each lime half represents something that is bothering you, and then squeeze the life out of it! If you have a reamer, you can use that, but truth be told it’s usually just as easy to press them with your fingers until most of the juice is out. Then you can also turn the halves inside out and press the pulp to make sure you’ve got all the juice. (Collect all the juice in a bowl, obviously.) This will take a little while, since there will be a lot of them, but you kind of get into a rhythm, and it becomes meditative and calming to squeeze all those juice droplets out. Once you’ve decimated all the limes, run the juice through a strainer (to catch all the pulpy/seedy bits) and into a measuring glass so you can see how much you’ve got. Set it aside.
– Put the sweetened condensed milk into a large bowl. Use a spatula to make sure you get all the creamy goodness out of the can. Then separate the eggs. Add the yolks to the bowl with the condensed milk. (Use the whites to make yourself an omelet or some meringue or whatever you like.) Whisk the yolks and condensed milk together until they’re well mixed.
– Slowly whisk in the key lime juice. The amount you’ll want to use depends on how much you have and how tart you like your pie. If you only have ½ cup, then just use that. If you have more than that, then you can use up to ¾ of a cup if you like a really tart pie (that’s how much I use) or just do ½ cup if you like it a little bit less tart. Or add somewhere in between if you’re somewhere in between. It’s flexible. Regardless of how much you’re using, you don’t want to dump it in all at once, or it will get lumpy. So just stir it in a little bit at a time. You’ll notice the texture gets sort of funny at first and almost looks like it’s going to curdle, but then it doesn’t and it kind of thickens up. Don’t stress — it’s supposed to do that!
– Pour the filling into the crust so that it reaches almost the top of the crust but doesn’t go over the edges. You might have a bit more filling than fits in your crust. No biggie, just don’t overfill the pie.
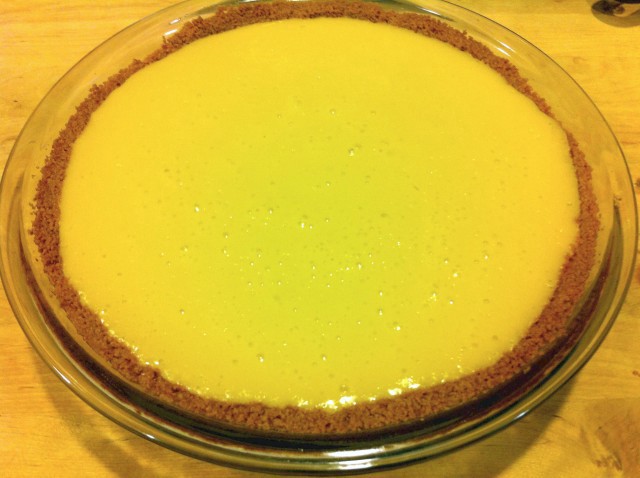
– Put the pie in the oven and bake it for about 15 minutes. When it’s done, The filling should be most of the way set but not necessarily all the way. It will look like this (except maybe not so freakishly yellow if you don’t set it on a butcher block and take a picture with bad overhead lighting):
– Let it cool on the counter for a few minutes. Then cover the top tightly with plastic wrap. You want to make sure the wrap isn’t touching the top of the pie. If it is, later when you go to remove it, it will damage the perfect surface of the pie (which is not the end of the world, but not as pretty).
– Put the wrapped pie in the fridge and let it chill for at least six to eight hours, but overnight is best. If you like, spend this time doing some meditation or taking a nap or whatever else you need to do to relax yourself even further.
– When it’s all chilled and set, it’s ready to eat. I sometimes like to make fresh whipped cream (with a little powdered sugar in it), but today I got lazy and used whipped cream from a can. (Gasp! How can something so fake be so delicious?!) Either way, put a substantial dollop of cream on top.
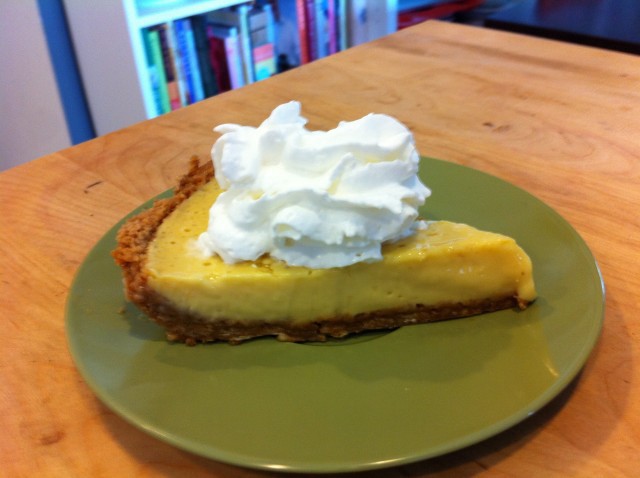
That’s it! Now you can sit back, in your newly calm state and enjoy the creamy custard, crunchy crust, and sweet/tart flavor of summer. Its delightful taste will improve your mood immensely, and before you know it you’ll be one of those weirdos who walks around with a smile on your face all day long!